Land Rover Troubleshooting Assistance : EFI Troubleshooting Assistance button.
Retrieving fault codes

EFI light: 1987-1989 Range Rover

1987-89 Rovers do not have any user accessible diagnostics. However, they are simple vehicles. The most common causes of an EFI light are:

  • Improperly adjusted or faulty (worn out) throttle sensor
  • Ignition misfire
  • Melted wires to the O2 sensors
  • Damage to the airflow meter connector
  • Damage to the ignition coil’s push on or screw on connections
Other faults are rare.

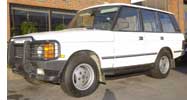
EFI / Check engine light: 1990-1995 Range Rover Classic
Check engine light: 1994-5 Discovery

** Note: These vehicles have both a “Check Engine” light and a “Service Engine” light. Check engine means you have a problem. Service engine means it’s been about 52,000 miles since the timer last reminded you to perform emission service. The information below pertains to Check Engine.

These fault codes will appear on a two-digit display found under the passenger seat. Note that although the display can indicate fault codes up to 99 not all numbers are valid codes.

You read the codes by removing the side panel of the seat base (Range Rover) or looking at the display under the back of the seat (Discovery).
I have provided identification for each fault code. In many cases the text refers to test xx. These tests are found in the Land Rover Workshop Manual in the fuel injection section. Some fault codes point to a failed sensor, some indicate an engine fault that has caused the sensor to deliver an out-of-range signal, and some code may indicate either or both. Do not be too quick to replace parts on the basis of codes alone.

Here is how you clear codes once you’ve read them and addressed the faults:

  1. Switch ignition on.
  2. Disconnect serial link mating plug, wait 5 seconds, then reconnect.
  3. Switch ignition off and wait for main relay (located under the passenger seat in Range Rovers) to drop out.
  4. Switch ignition on. The display should now be reset. If there are other faults, the next one will be displayed. Otherwise the display will be black.

If there is more than one fault repeat these steps to clear each fault until the display is blank.

If you clear a code without performing a repair, it (and the EFI light) may or may not return. Some codes are set by intermittent conditions that do not occur often. Other codes signal serious faults that are detected immediately upon startup.

On to the list of codes…

Nothing shown on display
Either nothing is wrong or the display is broken.
Code 02 - Power interruption
This code means power to the ECU has been disconnected and the truck has not yet been started. This code should go away as soon as the vehicle is started for the first time. Appearance of this code while driving may signal a problem within the ECU.
Code 12 - Airflow meter
Usually signals a problem with the airflow meter or the connector which can fall apart or become damaged. Refer to test 19, continuity test procedure.
Code 14 - Coolant sensor
Usually indicates a bad fuel injection coolant sensor. May also indicate a bad engine thermostat or a stuck viscous fan clutch. Refer to test 14, continuity test procedure.
Code 17 - Throttle potentiometer
Usually indicates a bad throttle position sensor. Refer to test 17, continuity test procedure.
Code 18 - Throttle potentiometer input high/airflow meter low
Usually indicates a problem with one of the two mentioned parts. Refer to tests 17, 18, and 19 of the continuity test procedure.
Code 19 - Throttle potentiometer input low/airflow meter high
Usually indicates a problem with one of the two mentioned parts. Refer to tests 17, 18, and 19 of the continuity test procedure.
Code 21 - Fuel tune select
Identifies that the tune select resistor is open circuit- refer to tune select resistor test. The tune resistor is embedded in the wire harness. This code may indicate damage to the wire harness.
Code 23 - Fuel supply
Check fuel system pressure, test 20 of continuity test procedure.
Code 25 - Ignition misfire
This code indicates that an ignition system misfire has been detected. Codes 40 or 50 indicate on which bank the misfire has occurred.
Code 28 - Air leak
One way to check for small leaks is by spraying choke cleaner at the joint you want to check while the motor is idling. A change in tone indicates the choke cleaner is being sucked into the engine. Check for air leaks in the following areas:
  1. Hose, air flow meter to plenum
  2. Breather system hoses to plenum
  3. Brake servo hose
  4. Vacuum reservoir hose (fresh air solenoid)
  5. Distributor vacuum advance
  6. Hose, purge valve to plenum
  7. Injector seals
  8. Joint - bypass air valve to plenum plenum chamber to ram housing ram housing to inlet manifold inlet manifold to cylinder head bypass air valve hose
Code 29 - ECU memory check
If this code appears all other faults are unreliable and must be ignored. Use the procedure below to clear the code and see if it re-appears. If it does, your ECU is almost certainly bad.
Procedure:
  1. leave battery connected
  2. switch ignition off
  3. wait for approximately 5 seconds
  4. disconnect ECU plug
  5. reconnect ECU plug
  6. switch ignition on and check display unit.

If fault code 29 is detected again, swap out the ECU for another one and retest.

Code 34 - Injector bank A
The display will indicate if the injector(s) are causing the engine to run rich or lean.
If the bank is running rich, check for - faulty injector wiring and connectors, stuck open injectors.
If the bank is running lean, check for - faulty injector wiring and connectors, blocked injectors.
Code 36 - Injector bank B
As code 34, except relevant to bank A injectors.
Code 44 - Lambda sensor A - left bank
Code 45 - Lambda sensor B - right bank
If one of these fault codes (#44 or #45) is displayed check the wiring to that particular lambda sensor. In addition this fault will be displayed if the vehicle has a condition which causes it to run very lean or very rich on one side (example - a vacuum leak or a bad injector). This code often appears in conjunction with the misfire codes in cases of bad ignition misfire (cross-firing plug wires)
If both codes are displayed, the voltage supply to the heater coils of the sensors must be checked. Check for 12V appearing on the O2 signal lead, and check the heater circuit for shorts.
Code 48 - Stepper motor
Check base idle speed as follows:
  1. First remove and clean the idle motor and the port it screws into. Clean the throttle body as well.
  2. On the top of the throttle body you will see a hole (possibly covered by an anti tamper plug) for the base idle adjuster.
  3. Remove the air bypass hose from the throttle body, which will cause the engine to speed up to 2500rpm or so. Unplug the connector to the idle motor after 5 seconds then reconnect the hose.
  4. Squeeze the hose shut with needle nose vise grips and adjust the base idle using an allen wrench to give an idle speed of 6-700rpm. Get the lowest speed you can that gives smooth running and does not stall when blipping the throttle. Screw in for slower idle, out for faster idle.
  5. Reconnect the idle stepper and remove the vise grip and you should be done.
  6. In addition, refer to tests 15 and 16 of continuity test procedure. Check road speed sensor- refer to test 25 of continuity test procedure.
Code 40 - Misfire bank A - left bank
Code 50 - Misfire bank B - right bank
If one fault code 40 or 50 is displayed check components applicable to the particular bank that the misfire has occurred on:
  1. Spark plugs
  2. Ignition leads
  3. Distributor cap
  4. Injectors - if code 34 bank A or 36 bank B displayed
If both codes are displayed, check the following components common to both banks:
  1. Distributor cap
  2. Distributor rotor
  3. Coil and its associated connections
  4. Distributor pick-up (air gap)
  5. Amplifier
  6. Injectors (if code 34 or 36 is displayed)

Code 58 - Group faults 23/28
This indicates that a fault has been registered that is caused by the fuel supply or an air leak but the exact fault cannot be identified. Check all items outlined under codes 23 and 28.
Code 59 - Fuel thermistor
Refer to test 13 of the continuity test procedure.
Code 68 - Road speed sensor
Refer to test 25 of continuity test procedure.
Code 69 Gearswitch
Refer to test 24 of continuity test procedure.
Code 88 - Purge valve leak
Refer to test 9 and 10 of the continuity test procedure.

1996 and newer Rovers

All 4.0SE and 4.6HSE and newer Range Rovers, and all 1996 and newer Discoveries use OBD II compatible diagnostics for the engine management system. OBD II is a diagnostic protocol supposedly shared by all carmakers as of the 1996 model year. Inexpensive scanners are available to read and reset OBD II codes. There appears to be some variability in OBD II scanner programming, so if you find a scanner that won't read codes from your newer Rover try another brand.
In our shop we read codes without difficulty using OTC and GenRad brand scanners. Many other brands work also. We have encountered problems with some Snap-On models. Note: most generic OBD II scanners cannot read fault codes from 1995 4.0SE models even though they have an OBD II connector.

Your scan tool should include a book of OBD II generic codes. The list of codes runs into the hundreds. Look here for European standard OBD II codes.

Land Rover has made many other functions available at the OBD II connector but they are not accessible with generic scan tools. If you are looking for a shop to service a Rover one prerequisite should be possession of an Autologic or dealer T4 dedicated test system, which gives access to all the other vehicle computer systems.

    Computer systems accessible only with the specialist Land Rover test system are:
  • SRS - airbags
  • ABS, ETC, HDC, TRACS - antilock brakes, hill descent control, and electronic traction control
  • EAS - electronic air suspension
  • ETC - electronic transmission control
    *note that the transmission controller can set faults that turn on the “service engine” warning when no faults are present in the engine computer.
  • ACC - automatic climate control
  • SLABS - the integrated brake/suspension module on Discovery II
  • BECM - the body control module

In addition, keys and alarm controllers can only be programmed with the specialist tools.

We use the Autologic system at JE Robison Service.

J E Robison Service Co Inc of Springfield, Massachusetts, is an independent business that specializes in the sale and service of used Land Rovers. We are not an authorized Land Rover dealership, we do not sell brand new Land Rovers and we are not otherwise affiliated with, originating from, sponsored by, or approved by Jaguar Land Rover North America, LLC in any way.